3.3 latest
From the hundekraft 3.3 release.
-
strip.knl 55.5 KB · ↓ 1
- hundekraft
File details
- Format
- hundekraft (kennel) plugin
- SHA-256
762521d6720067e59bdf0644c0075e5f9657acf3b25909ccc3e861dbc4abe554
by hundekraft
A high-pass, low-pass, EQ band, drive and level for the synth, the drums and two tape tracks
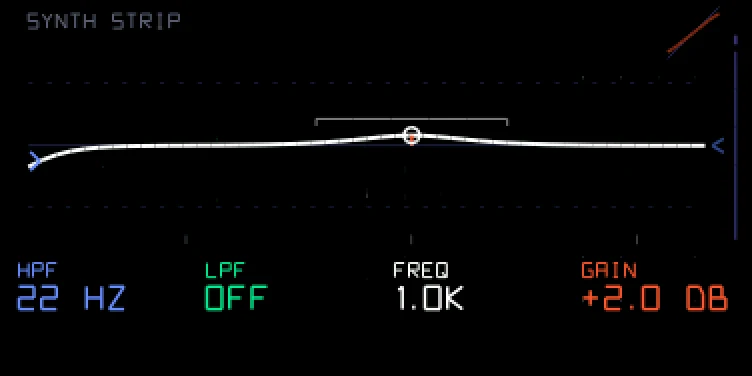
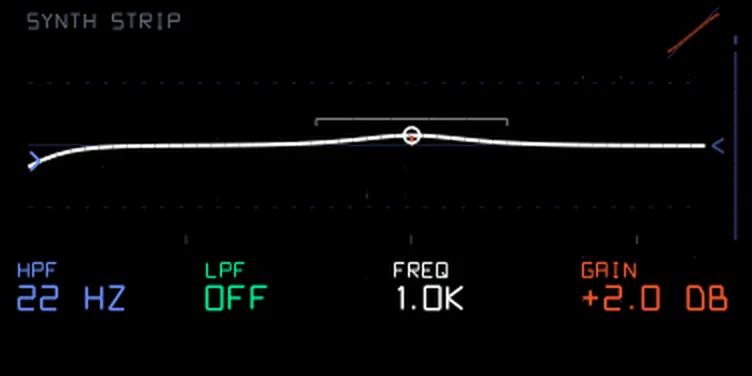
A high-pass, a low-pass, an EQ band, drive and level on the synth, the drums and the tape tracks.
The channel strip shapes the synth and the drums before the tape, like the channel on a mixing desk. It sits before their effect. There are two strips, one for the synth and one for the drums. They stay as they are when you change sounds or kits, and they are kept after a restart. Both start switched off, so nothing changes until you turn one on: hold Shift and turn green right.
Press mixer, then T2 for the EQ page, then hold Shift and press T2. The strip opens on the synth or the drums, whichever you were playing. Press Shift + T2 again for the other strip, again for the tape strips, and once more to close it. The keyboard keeps playing while it's open, so you can listen as you turn. Any mode key closes it too, and so does any T key except on the tape strips.
| Encoder | Turn | Hold Shift and turn |
|---|---|---|
| blue | HPF: cuts the lows, 20 Hz to 12 kHz. All the way left is off | LEVEL: -12 to +12 dB, to make up for level the other stages added or took away |
| green | LPF: cuts the highs, 20 Hz to 20 kHz. All the way right is off | ON or OFF: right is on, left is off. Use it to compare with and without |
| white | FREQ: where the EQ band sits, 50 Hz to 12 kHz | Q: how wide the band is, 0.3 (wide) to 8 (narrow) |
| orange | GAIN: the EQ band, -15 to +15 dB in half-dB steps | DRIVE: tape-style saturation, 0 to 100 %. Loud peaks round off while the level stays about the same |
Most of the HPF and LPF travel sits between 200 Hz and 8 kHz, where you'll do most of your shaping. The first and last few steps move faster through the deep lows and the very top.
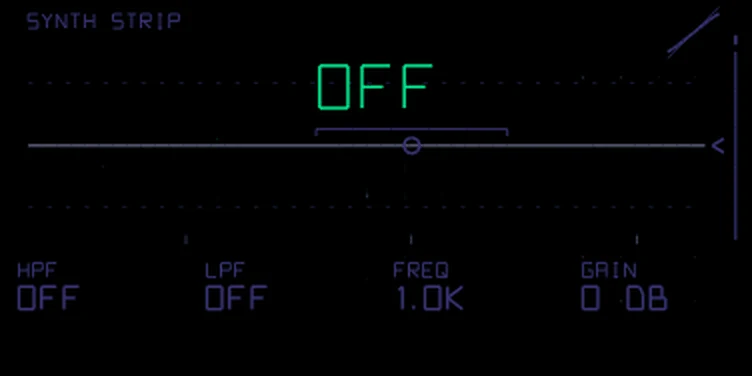
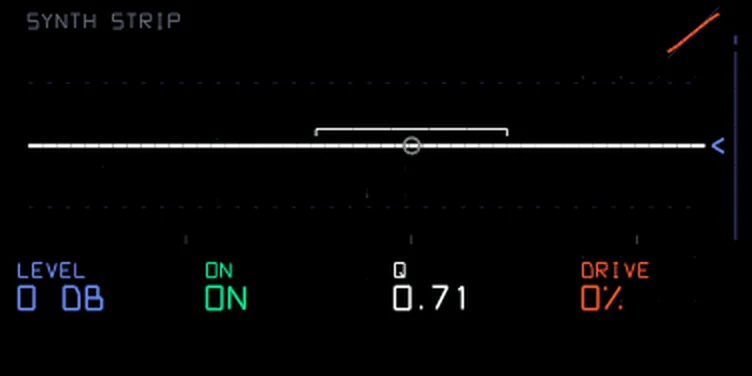
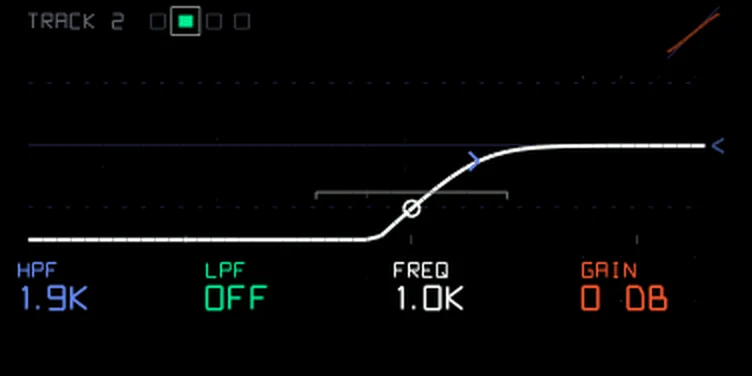
The line on the screen is what the strip does to the sound, from 20 Hz on the left to 20 kHz on the right. It moves as you turn and as an LFO moves the strip. Each control has a handle on the line in its encoder's colour: arrowheads for the HPF and LPF, a ring on a stem for the EQ band, a bracket over it for Q and a tick on the right edge for LEVEL. The small curve in the top right corner shows what DRIVE does to loud peaks. The values run along the bottom. Hold Shift to see LEVEL, ON, Q and DRIVE there instead. When an LFO moves the strip, a faint copy of the line shows where your knobs are. While the strip is off, the screen says OFF and the knobs still set the values, ready for when you switch it on.
The bar on the right edge shows how loud the synth or drums come out, after the strip and their effect. It turns orange near the top. When the sound hits full level and clips, the small mark above the bar lights orange for about a second. The bar only moves on the strip of the instrument you're playing: on the other strip it stays empty. A very short peak can slip past it.
Push an encoder to put its control back to flat: blue turns the HPF off, green the LPF, white sets FREQ back to 1 kHz and orange GAIN to 0 dB. Hold Shift and push blue for LEVEL 0 dB, white for Q 0.7 or orange for no DRIVE. Hold Shift and push green to switch the strip on or off.
You can move the strip with an LFO. On a quad LFO page or the master LFO page, turn white past the other targets to reach HP, LP, FQ, GN, Q, DR and LV. On a pond LFO page it's orange, and the targets show their full names. The master LFO moves both strips. The stock LFOs can't reach the strip. The strip saves the knob values you set, not where the LFO happens to be.
Every stage you leave at its start costs nothing. Each one you turn on uses a little CPU; with all five on, a heavy synth may get close to its limit.
Each of the four tape tracks has a strip of its own. It sits after the tape and before the mixer's volume and pan, so
you can take the rumble off a mic take or tuck a bright track back into the mix after it's recorded.
On the strip page, press Shift + T2 until the title says TRACK. It opens on the track that's selected on the tape.
Press T1 to T4 to pick another track. The four small squares at the top are the tracks: a filled square has its
strip on, and the box shows the one you're editing. The encoders work as on the synth and drum strips. Press
Shift + T2 once more to close the page.
Two tape strips can be on at the same time. If you try to switch on a third, the OP-1 says 2 tape strips at most.
Hold Shift and push green to let the master LFO move this track's strip. LFO lights up next to the
squares. The master LFO reaches only the tracks you've set this way, and no other LFO reaches the tape strips.
Every tape keeps its own tape strips. Switch to another tape and its strips come back the way you left them.
A strip that's off, or on with every control flat, leaves the track exactly as it was. Tracks you send out over USB or
to FX2 carry the strip. A bounce doesn't: it copies the recorded tracks as they are.
From the hundekraft 3.3 release. Full manual
From the hundekraft 3.3 release.
762521d6720067e59bdf0644c0075e5f9657acf3b25909ccc3e861dbc4abe554